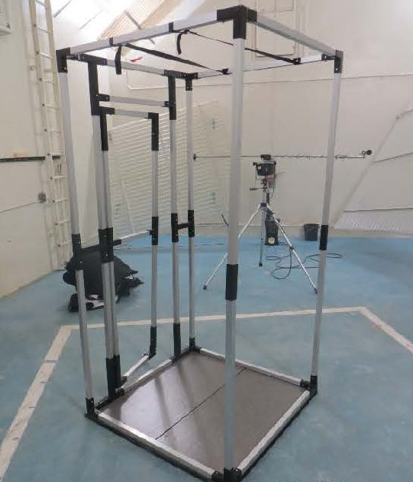
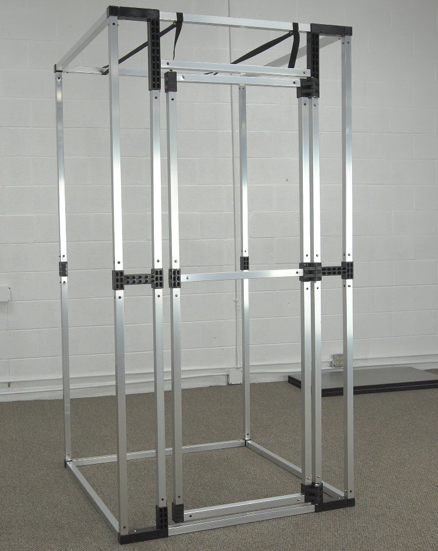
Here is how assembled frame would look like:
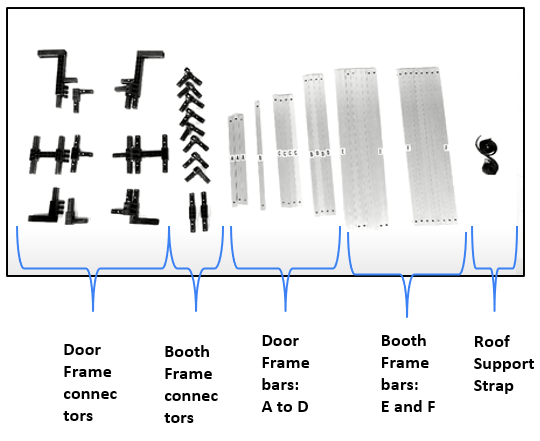
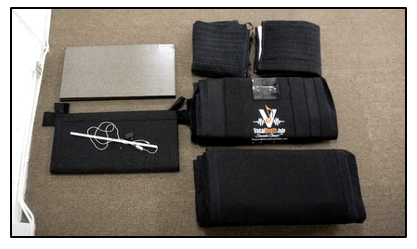
Included Frame Parts: Door Frame connectors, Vocal Booth Frame connectors, Door Frame bars (marked with letters “A” to “D”), Booth Frame bars (marked with letters “E” and “F”) and Roof Support Strap:
Frame Assembly overview:
Please note: lay out the Door frame parts on the floor. The 3-way connectors and the top/bottom horizontal poles marked with letter “E” and vertical poles with letter “F” located on the frame box package.
Door Frame assembly:

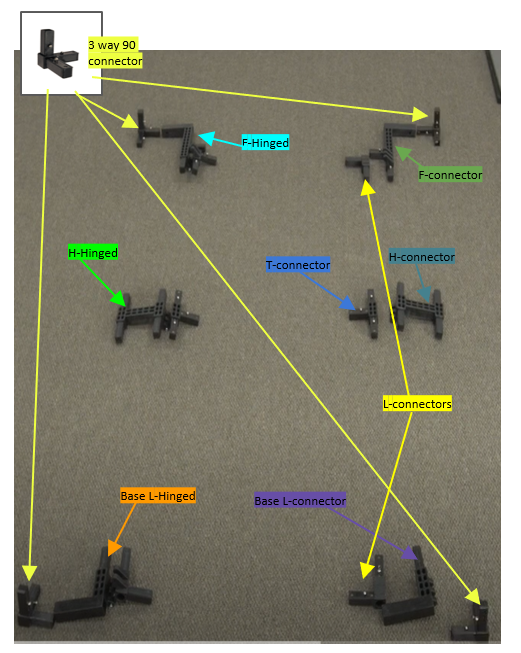
Door Frame connectors:
Please lay out the Door connectors on the floor:
Lay out the Bars
1. Once the parts have been laid out, begin connecting the bars to and through the various connectors:
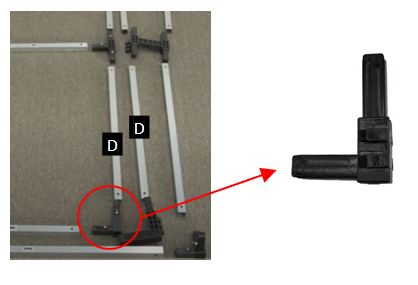
Attention: please make sure to install L connector as shown with the longer end inserted in the vertical pole marked “D”:
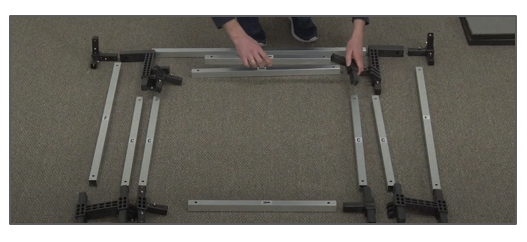
Let’s connect all parts together:
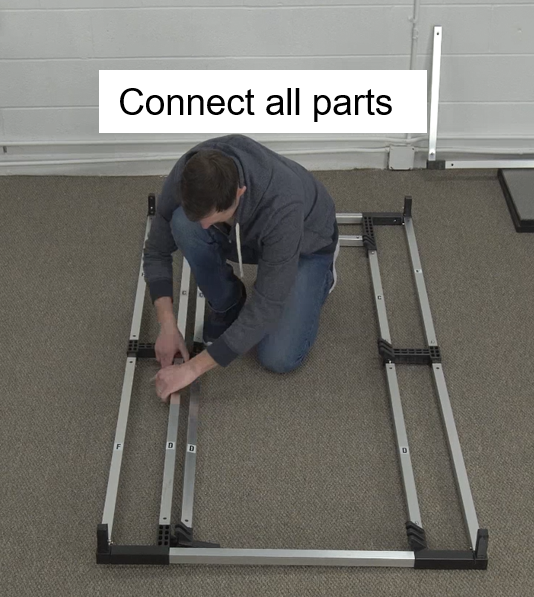
Important note: when connecting the middle section, please make sure to align all parts first and fit them in, then connect one by one trying to keep all parallel.
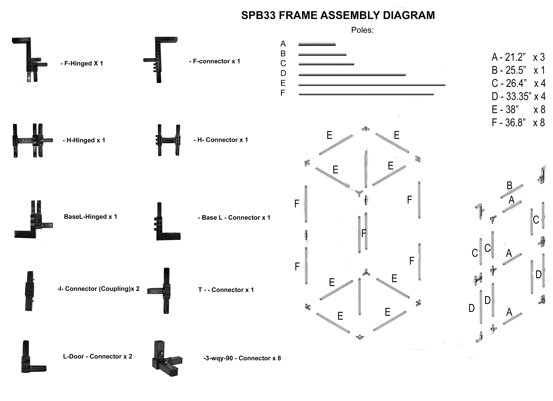
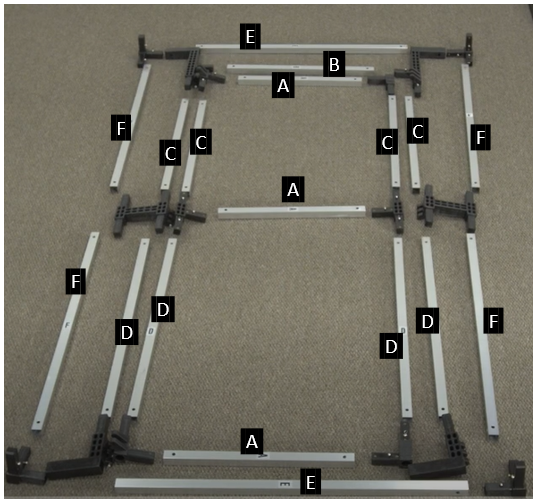
Frame Assembly Diagram:

Note: “E” and “F” tubes may not be marked. However, you can tell them by size: “E” is longer then “F” tube. E = 38 inches and F = 36.8 inches.
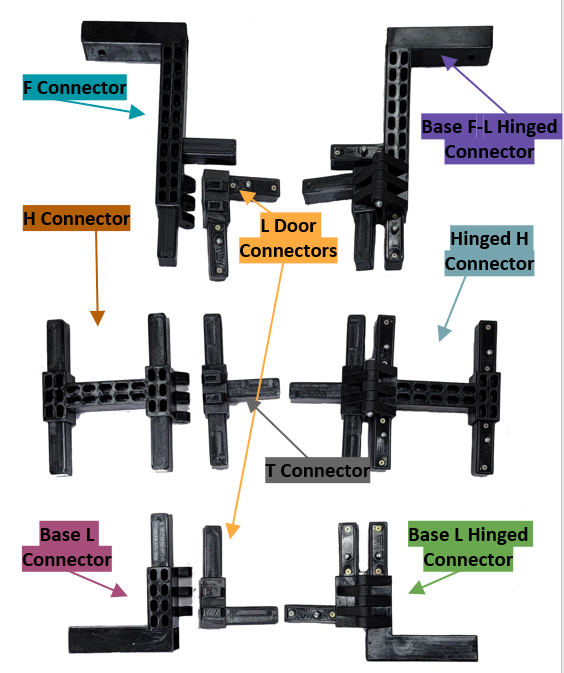
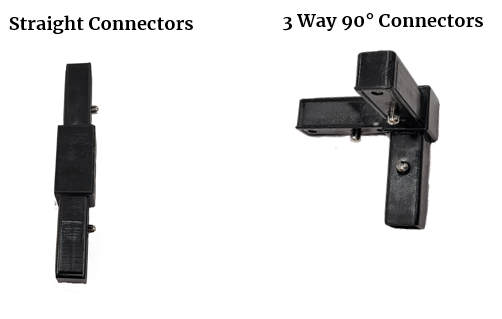
Main Frame Connectors
There are two types of main frame connectors: Straight Connectors and 3 Way 90° Connectors:
Continue assembling the rest of the frame:
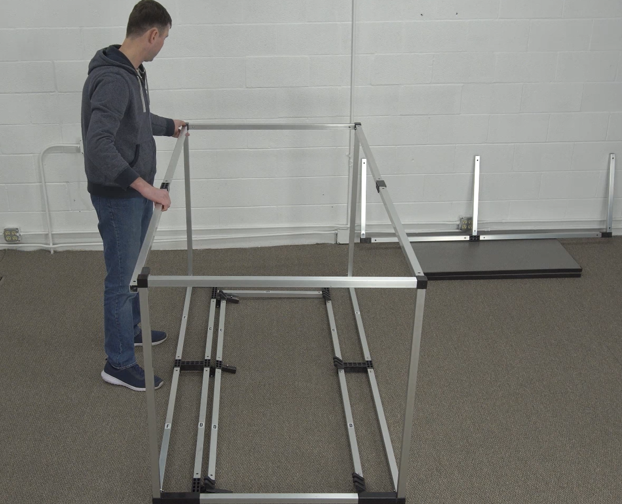
Note: if you do not have enough ceiling clearance, please position the door frame vertically and continue assembly of the rest of the frame in vertical position.
Attach Roof Support Straps:
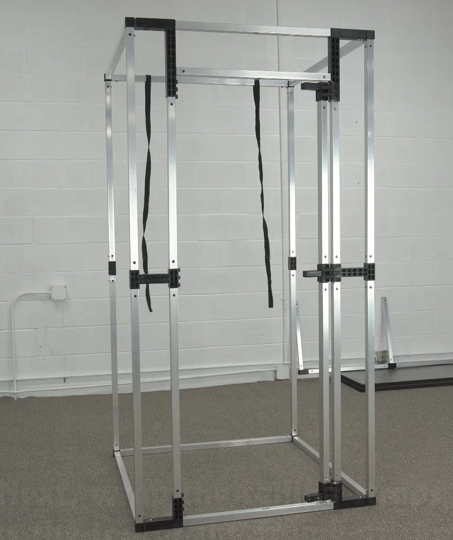
Note: the roof support straps have a loop on the end and the other end is fastened to the opposite side bar by D-ring attachment.
Attach the movable part of the door frame:
Congratulations! This completes Frame assembly.
Please note: we recommend the following order:
- Start with installing blankets;
- Wall panels;
- Door side panel;
- Roof panel.
Sometimes when the space is tight and you have to install the booth in a corner – it make sense to install the back panel (close to the wall) first. Then blankets, side walls, etc.
Once the frame is assembled it will be difficult to move it, so ideally you want to set it up right where it supposed to be.
Hang the blankets on the frame:
Note: hang the blankets on the inside of the frame. Start from the middle of the door and follow around until you get back to the door. No need to stretch the blankets they should hang loose.
Hang the Wall panels on the frame:
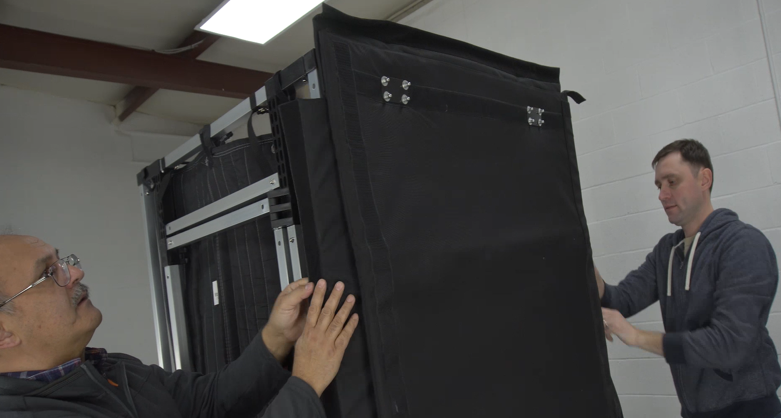
Please note: have two people when installing the wall panels. They are quite heavy.
Once the panels are on the frame you can slide them to adjust for exact position.
Each panel has inside flap with sound blocker that needs to be wrapped around and hooked by Velcro to the adjacent panel. This flap seals the gap between the walls. The outside flap needs to be pulled tight and also attached to the adjacent panel.
Installing the Door panel:
Note: start by hanging the Door panel same way as the wall panels. Then adjust the position to make sure that the door frame fit and the door can open. You would need to place the metal hook brackets of the door panel over the plastic F connectors of the door frame.
Then use the Velcro tie ups to attach the door panel to the door frame all around.
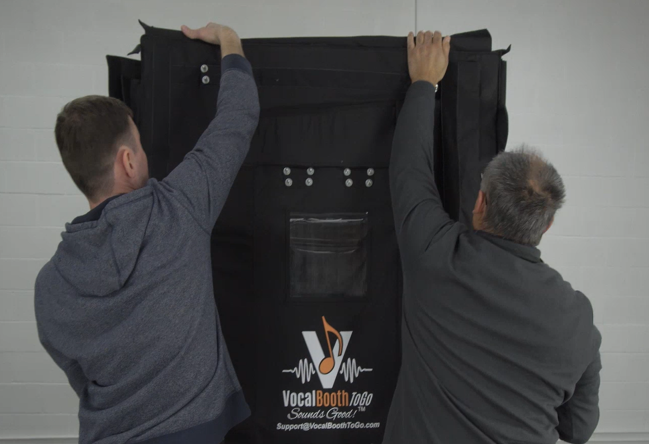
Installing the Roof panel:
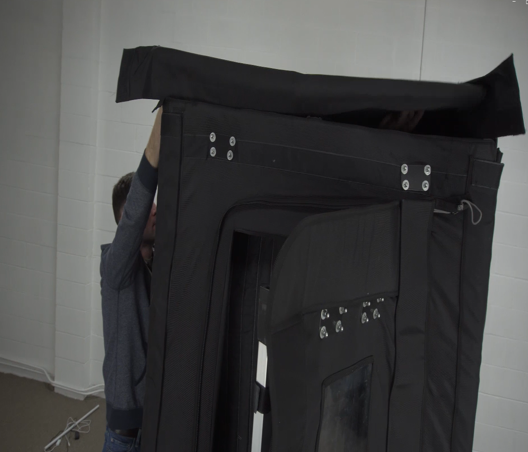
Note: With two people after you place the roof panel on the frame – one person should help from the inside by pushing the panel upwards and disconnecting from Velcro and the other person would align the roof from the outside. Once the roof is squared on the top the person on the inside would unfold and attach the interior flap. To finish up seal the roof with the exterior flaps.
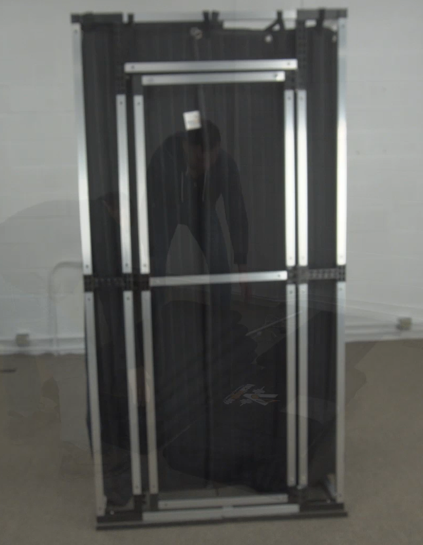
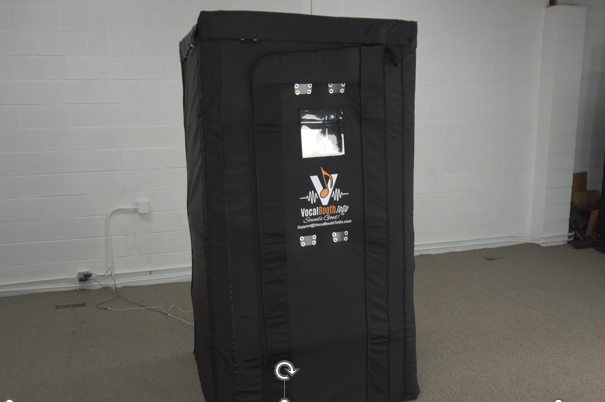
This completes the SPB33 (2022 model) assembly:
Accessories for SPB33:
Light can be placed simply under the roof straps.
Ventilation fan: If you Purchased the fan with the Sleeve the fan itself should be positioned outside and the plastic portion of the sleeve can be inserted between the wall and door panels. Simply open the left side corner door/wall panel and insert the sleeve in it.
You can also add a longer tube in case you want to draw air from a window or an AC.
If you require any assistance with SPB33 vocal booth, please contact us: [email protected] at any time. We’ll be happy to assist you!