

PRECUT PVC vocal booth frame kit assembly Instructions
PDF & Print [bws_pdfprint display=’pdf’]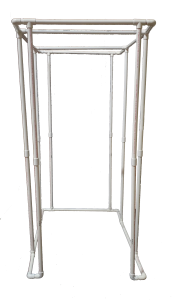
PVC FRAME ASSEMBLY INSTRUCTIONS
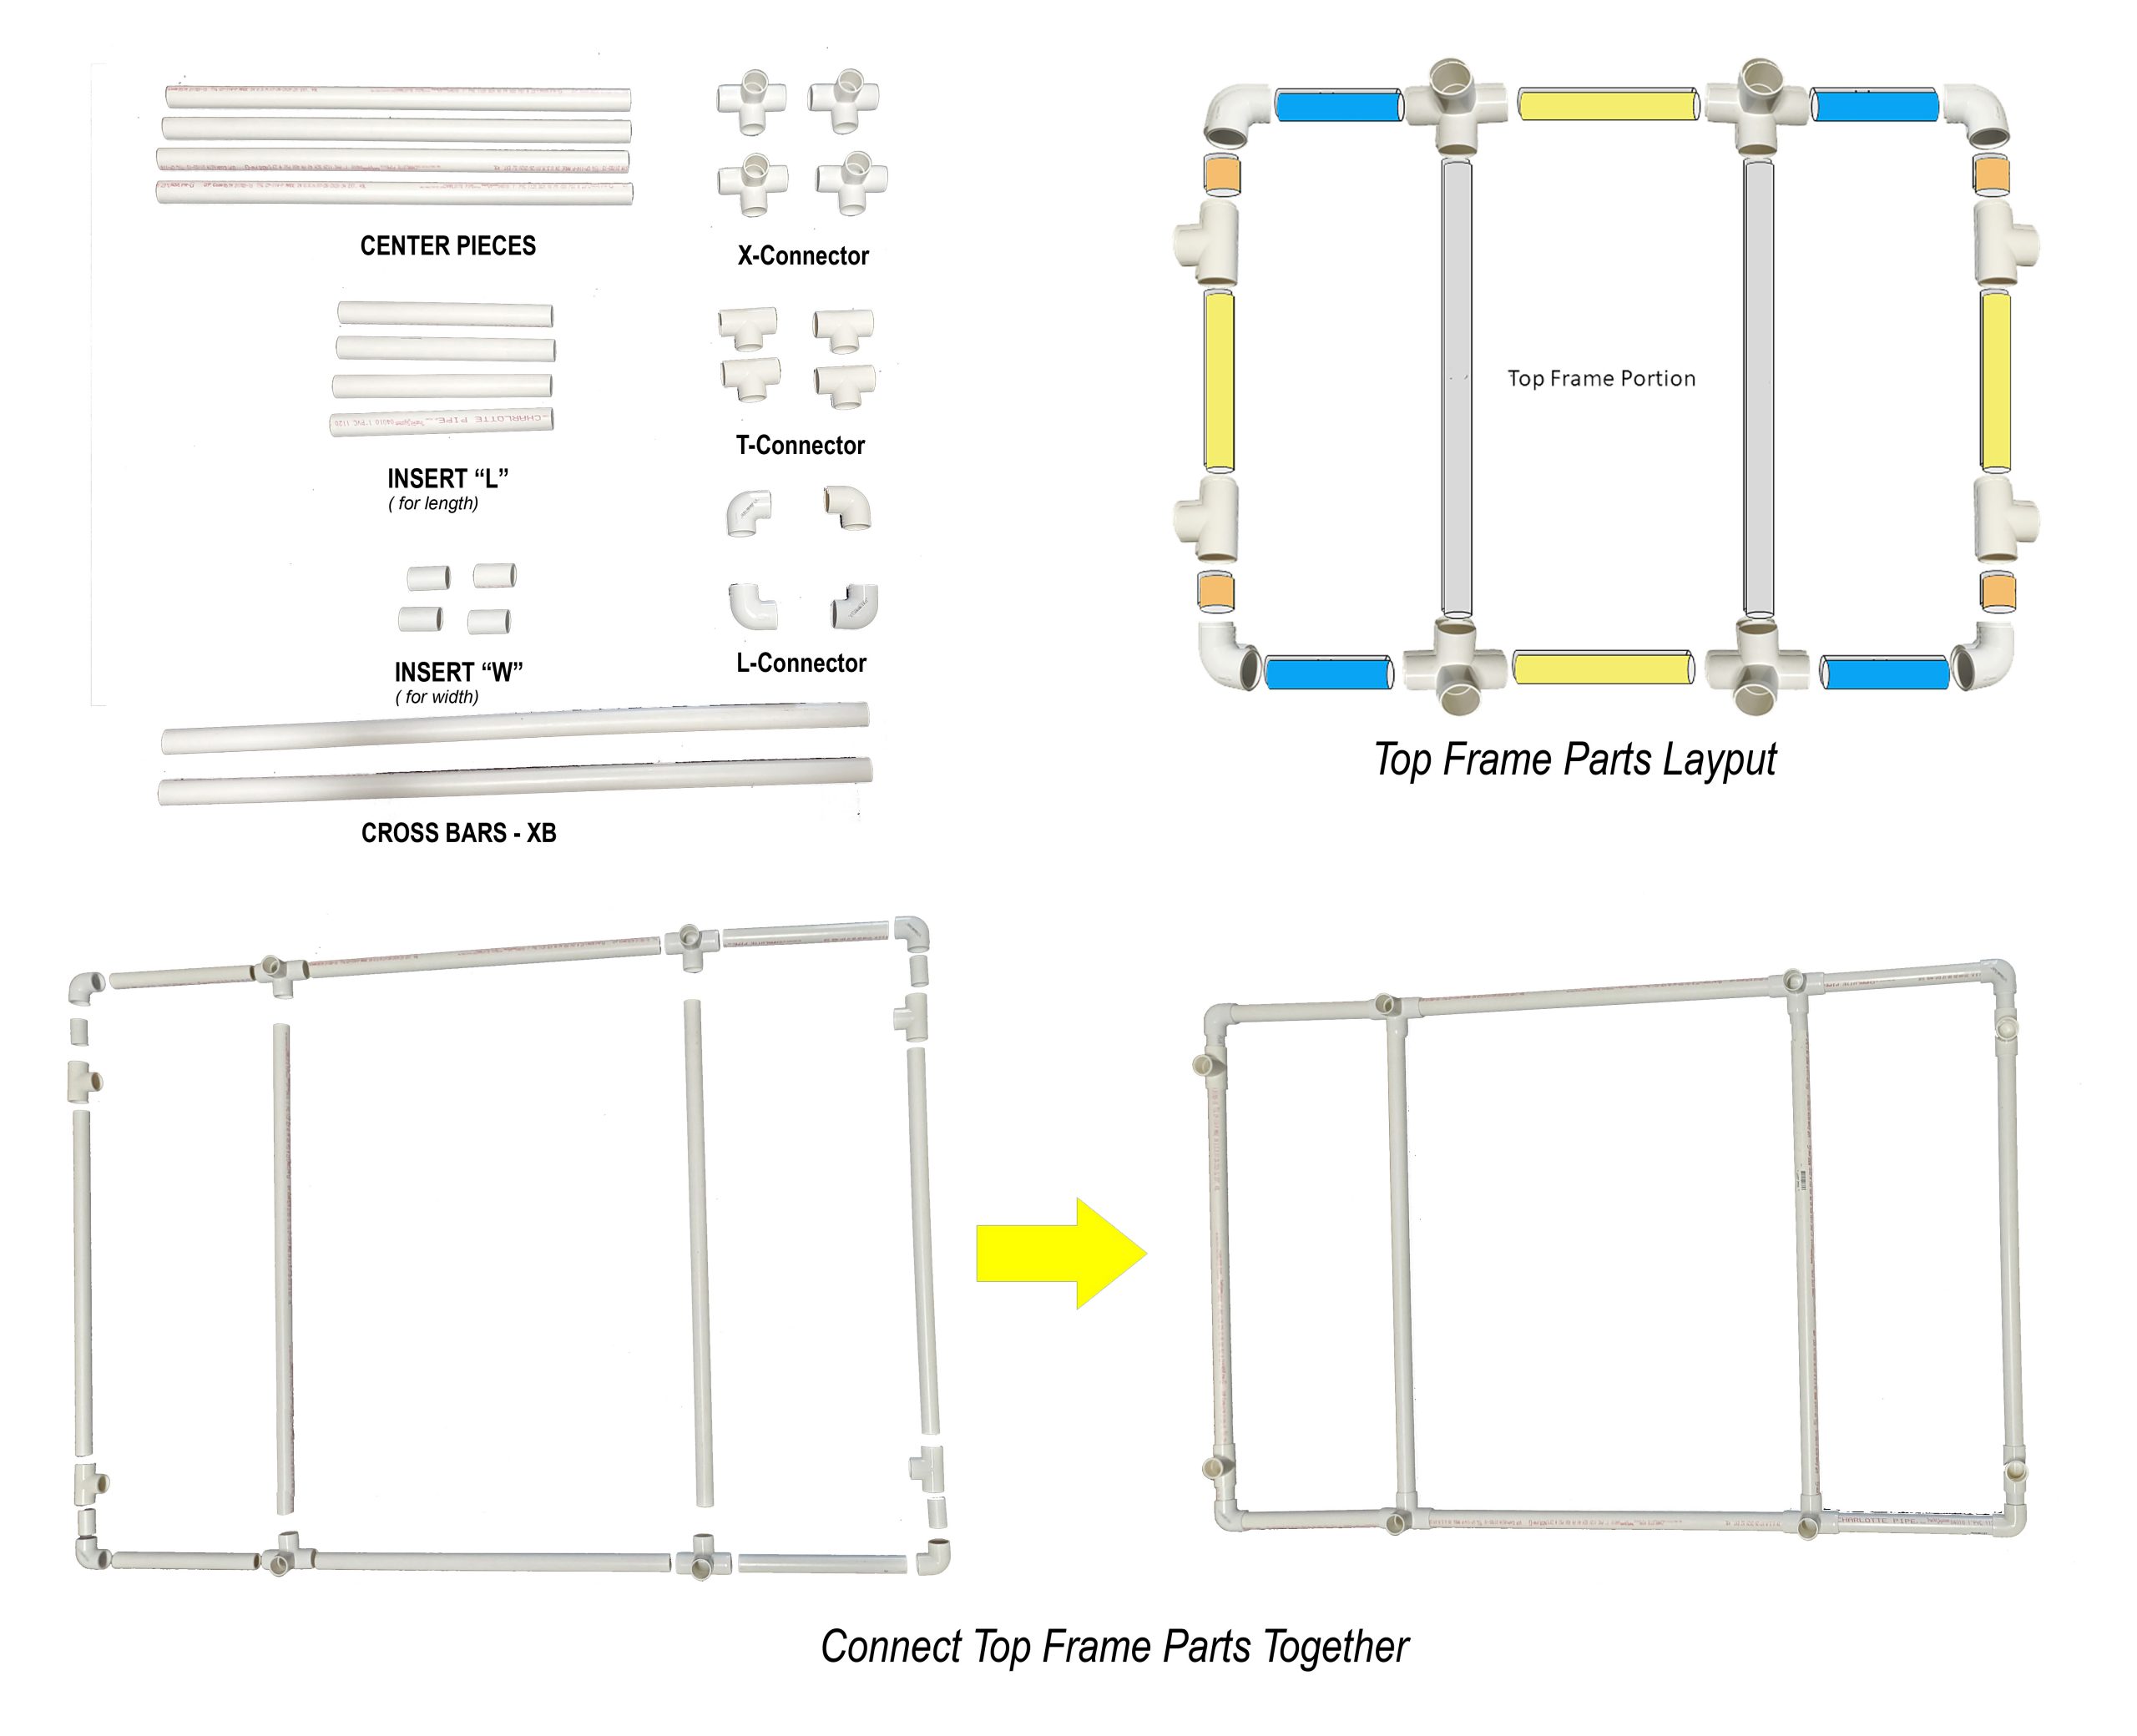
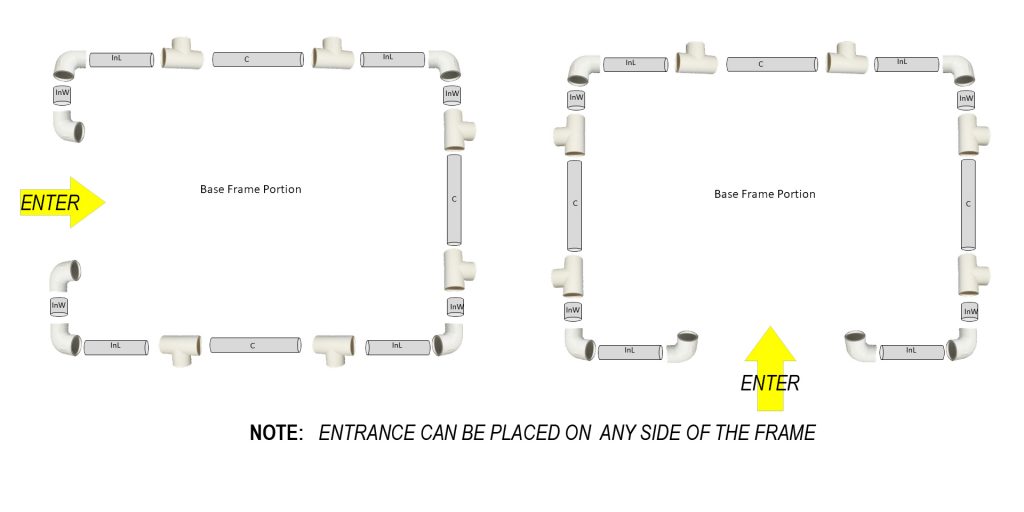
a) Assemble the base frame portion: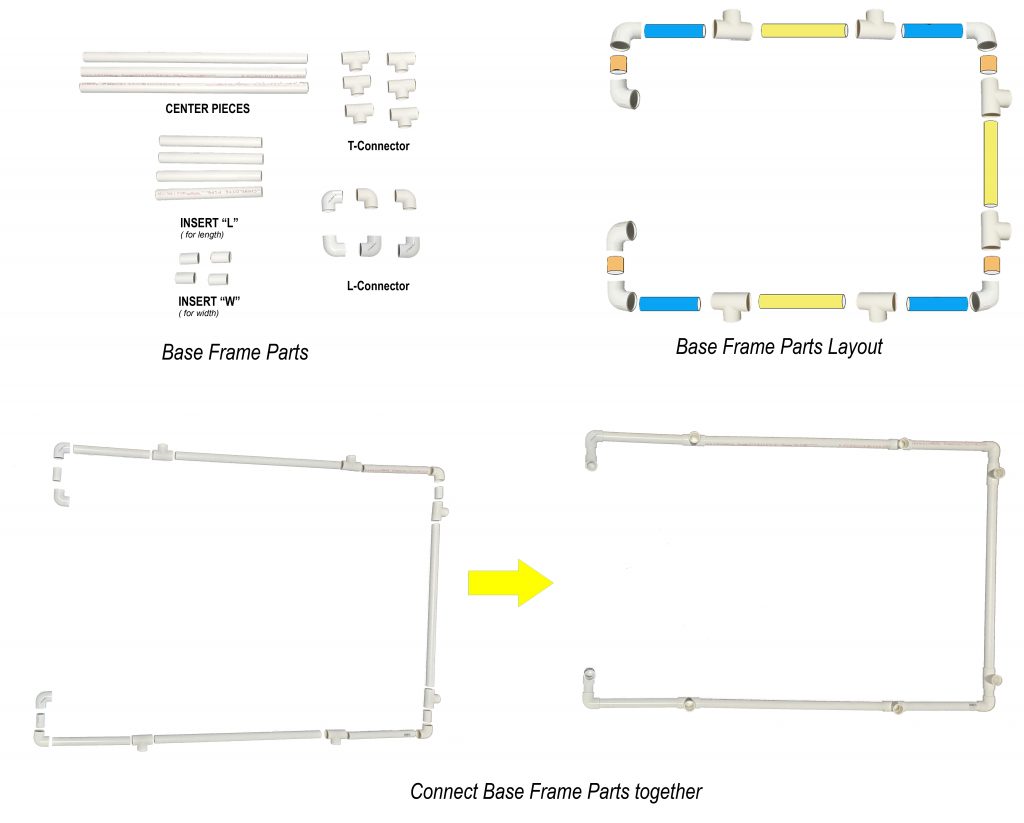

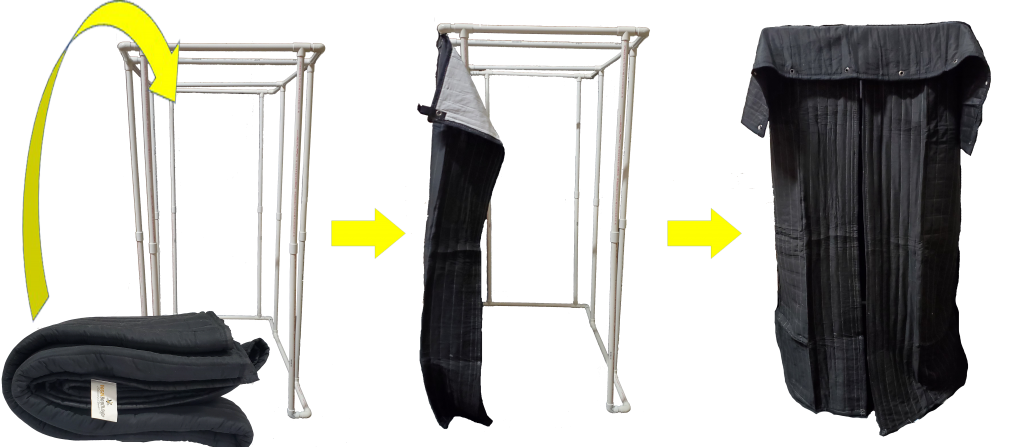
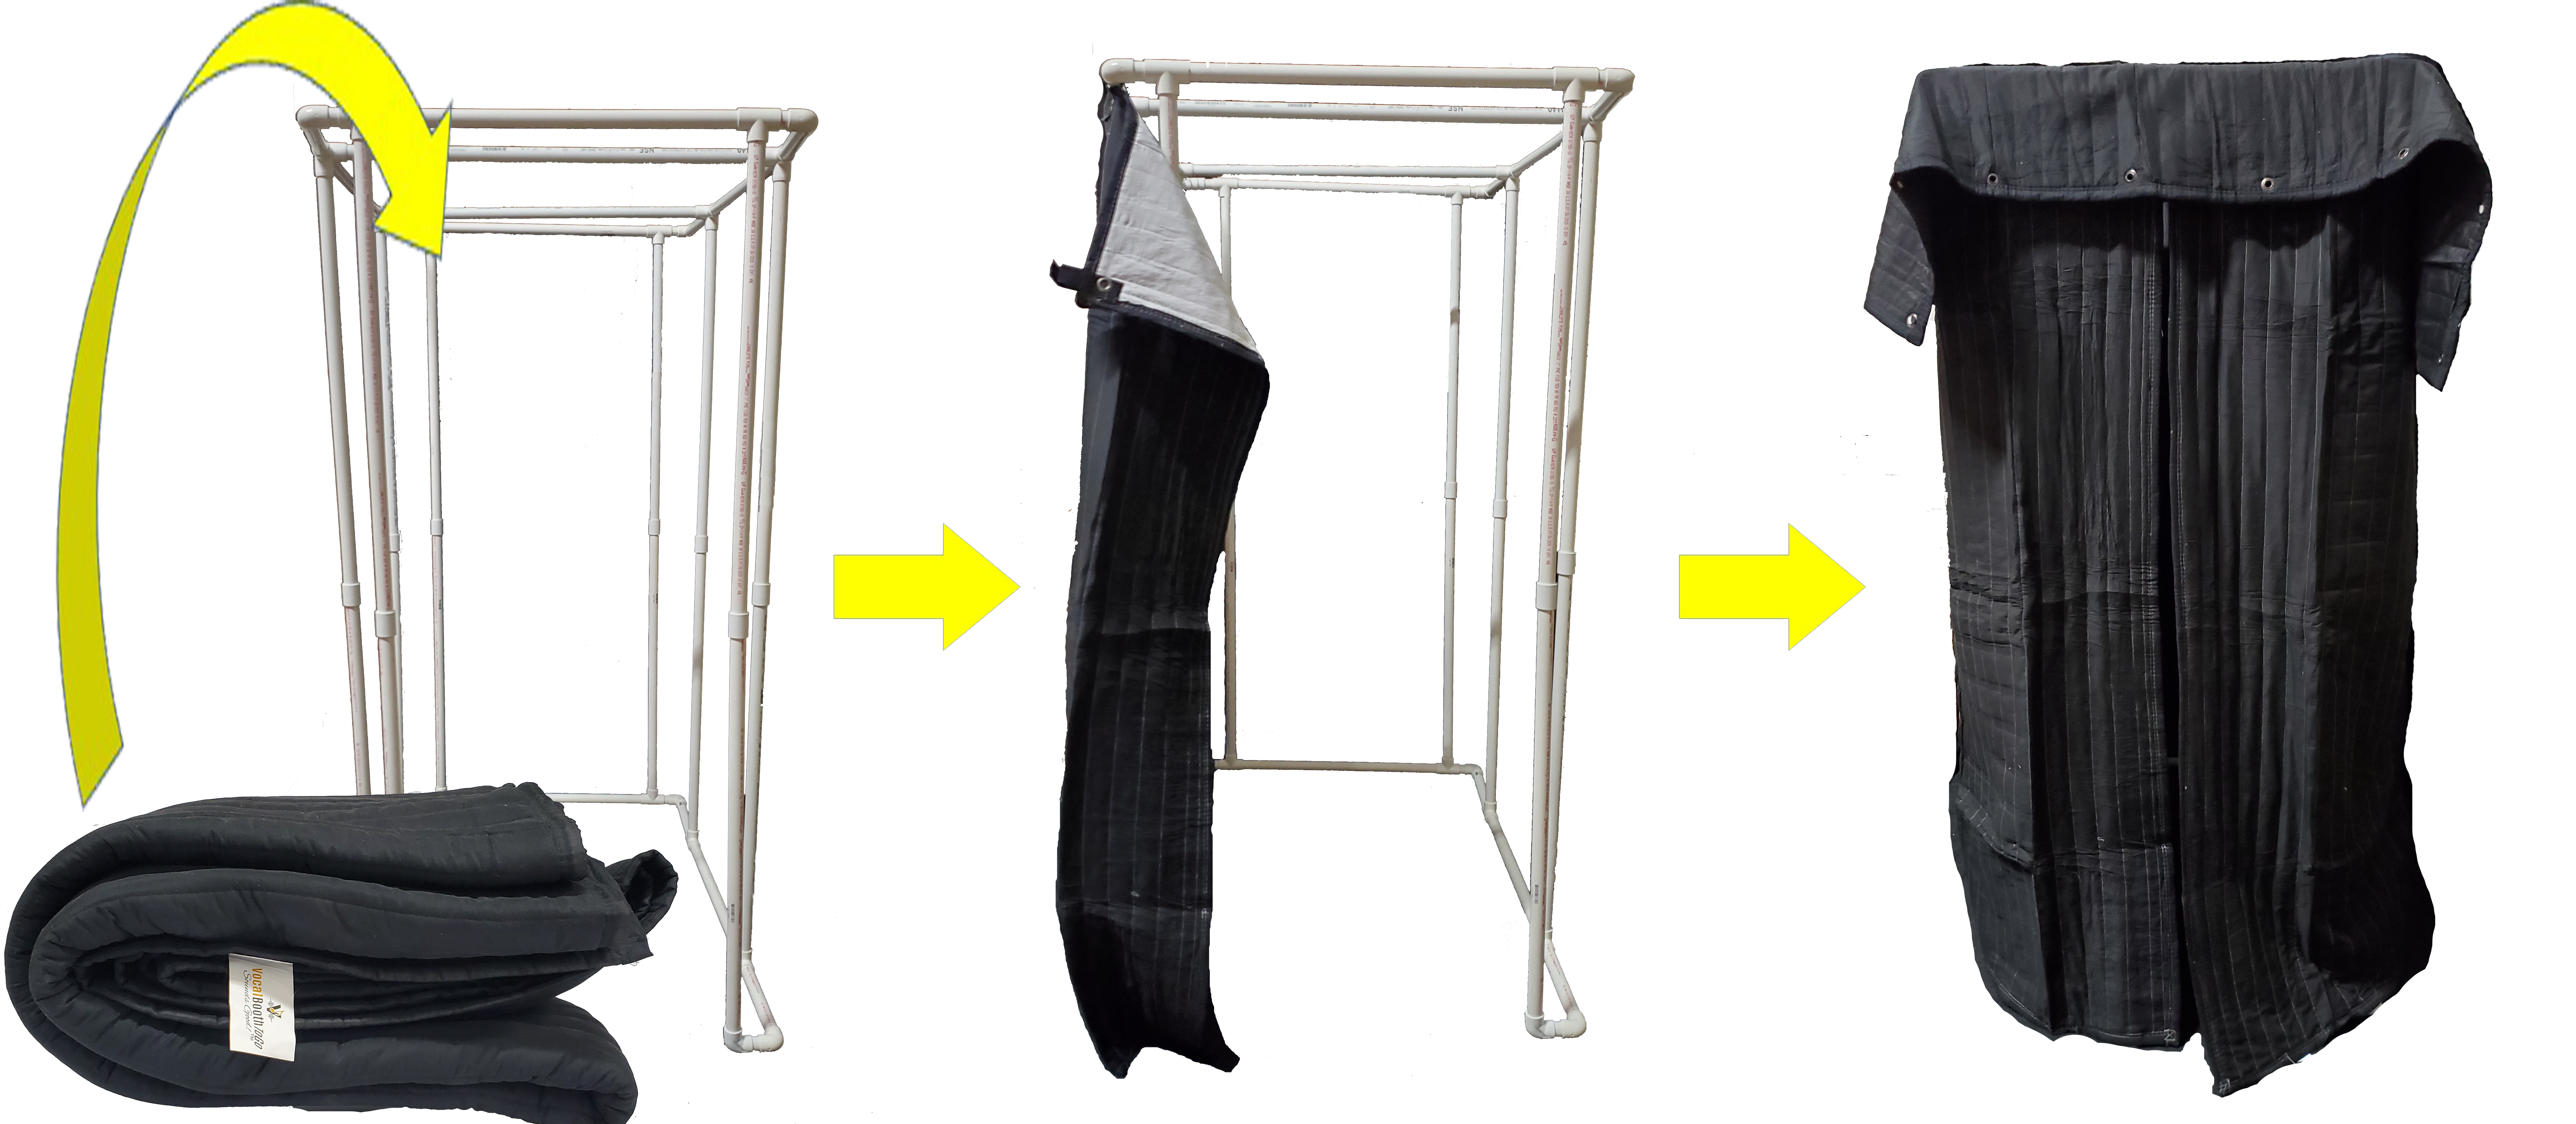
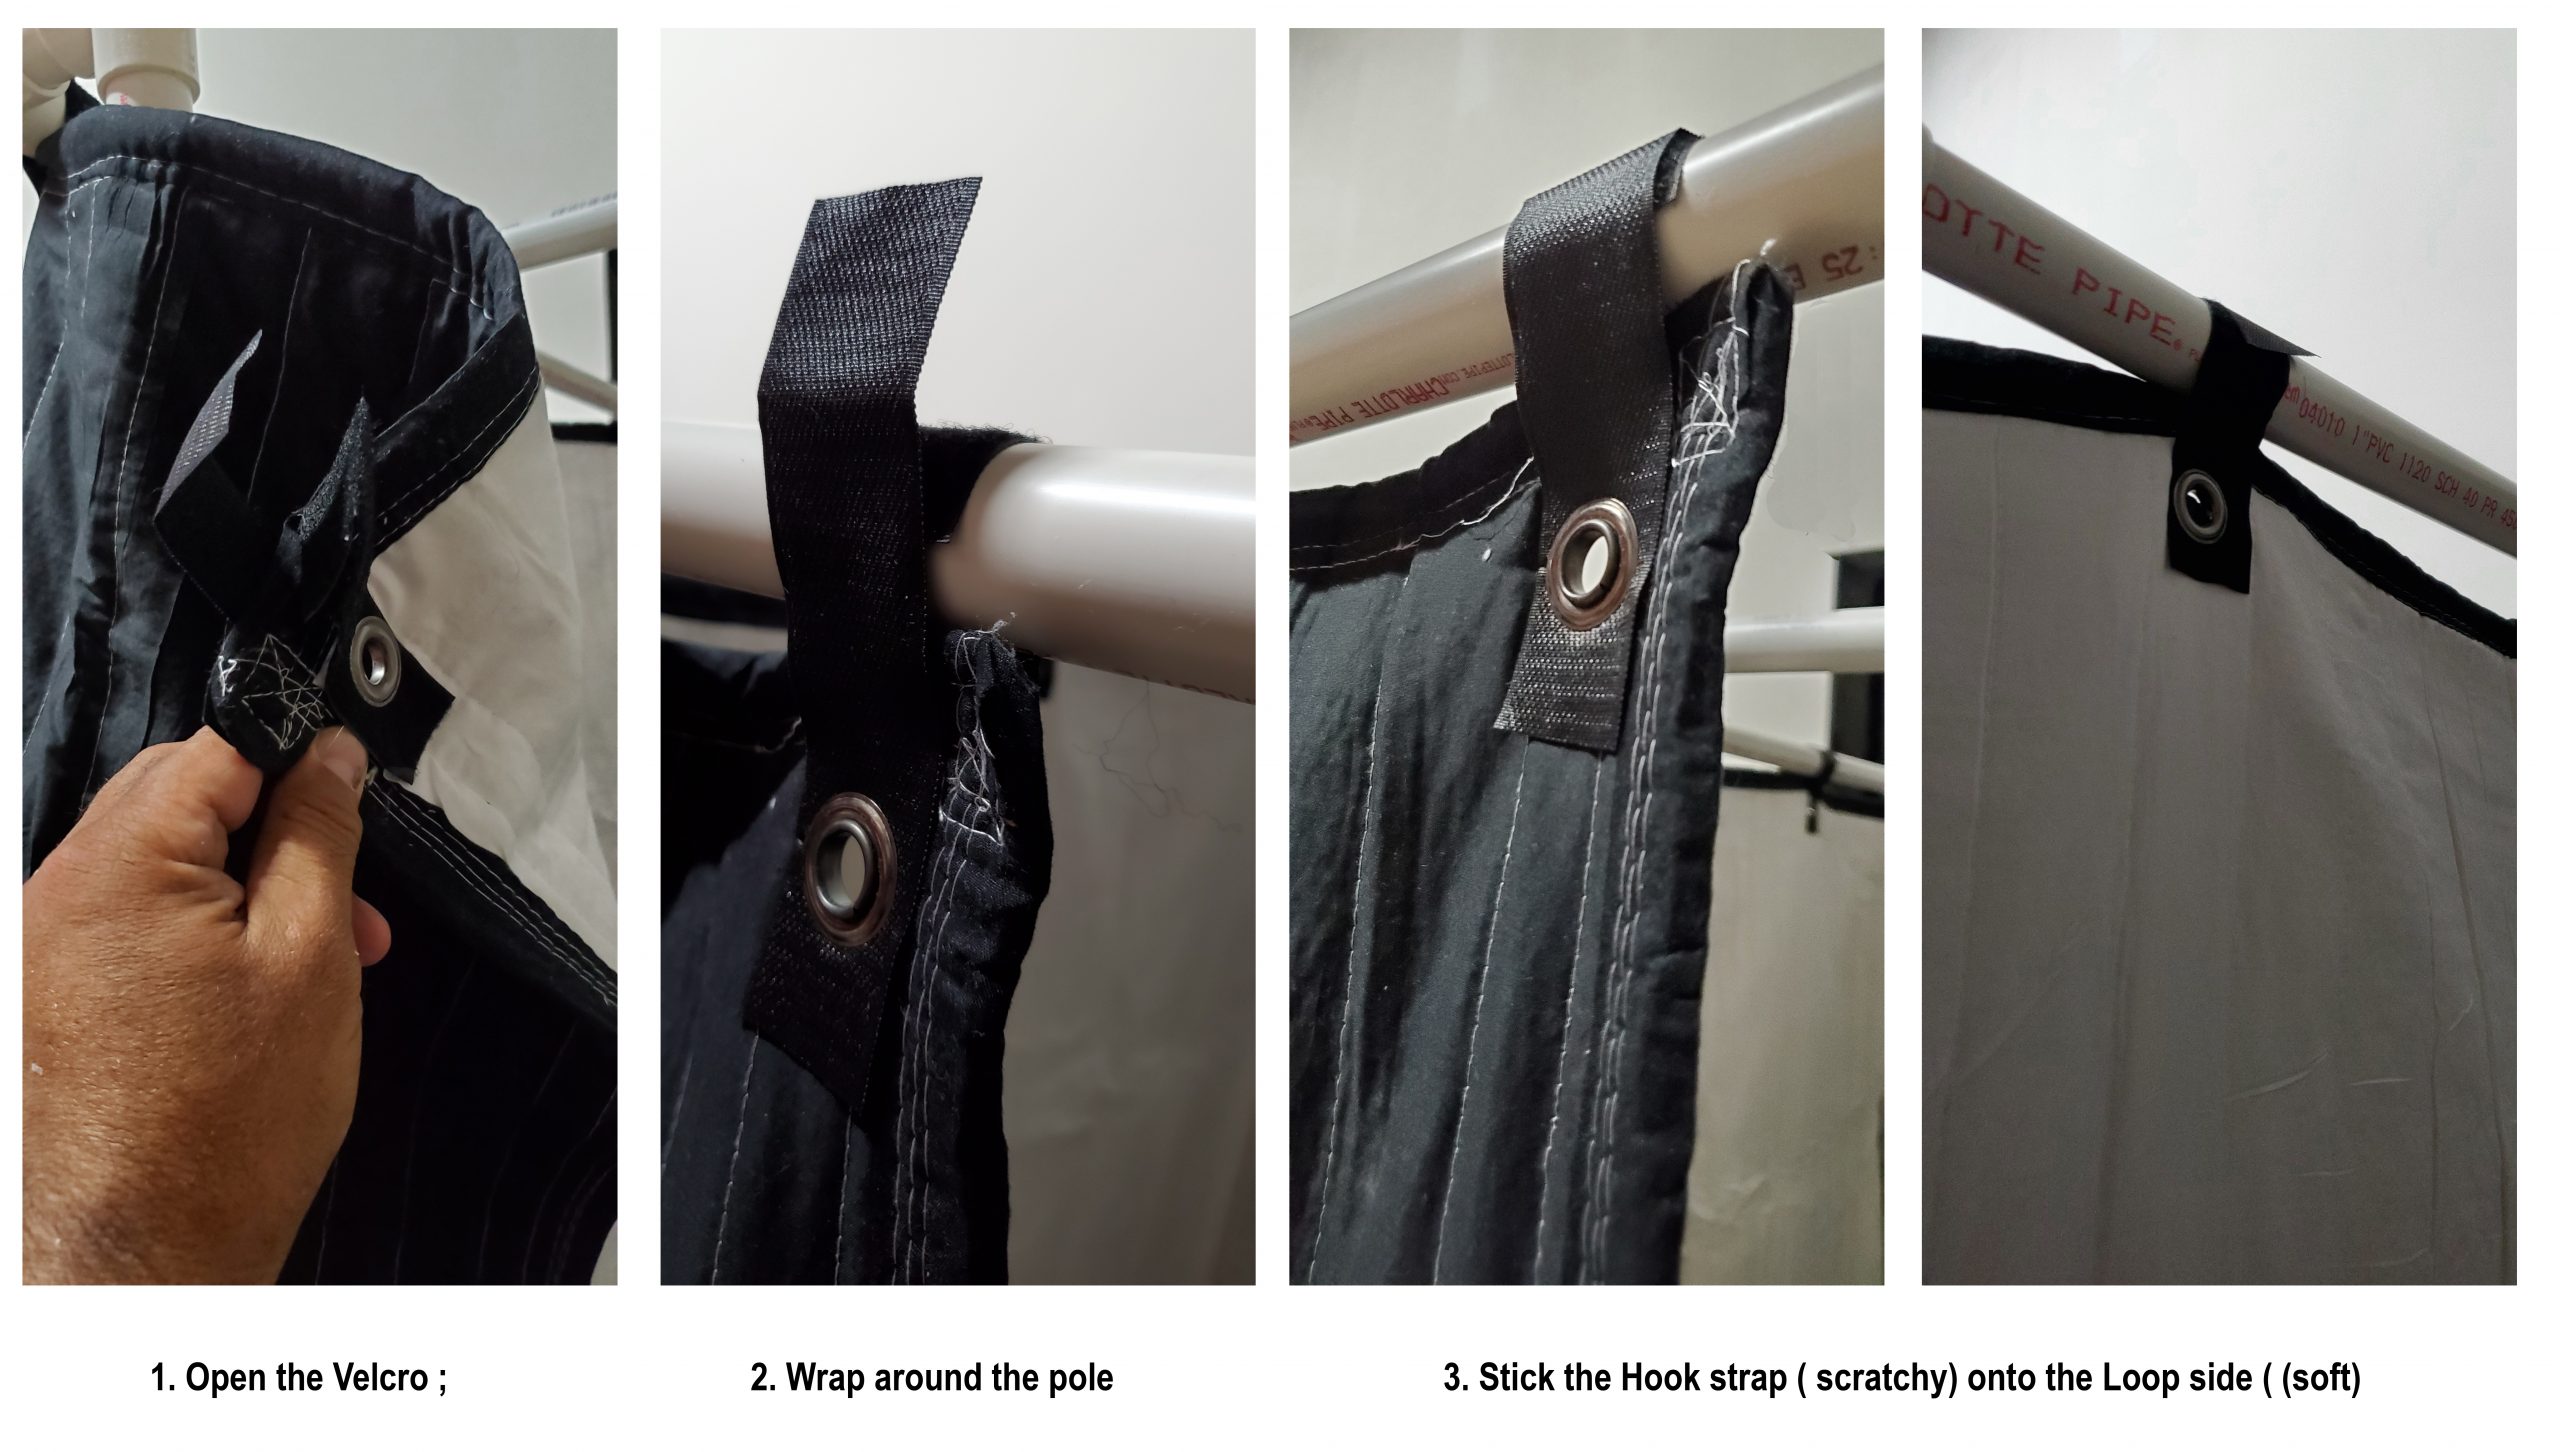
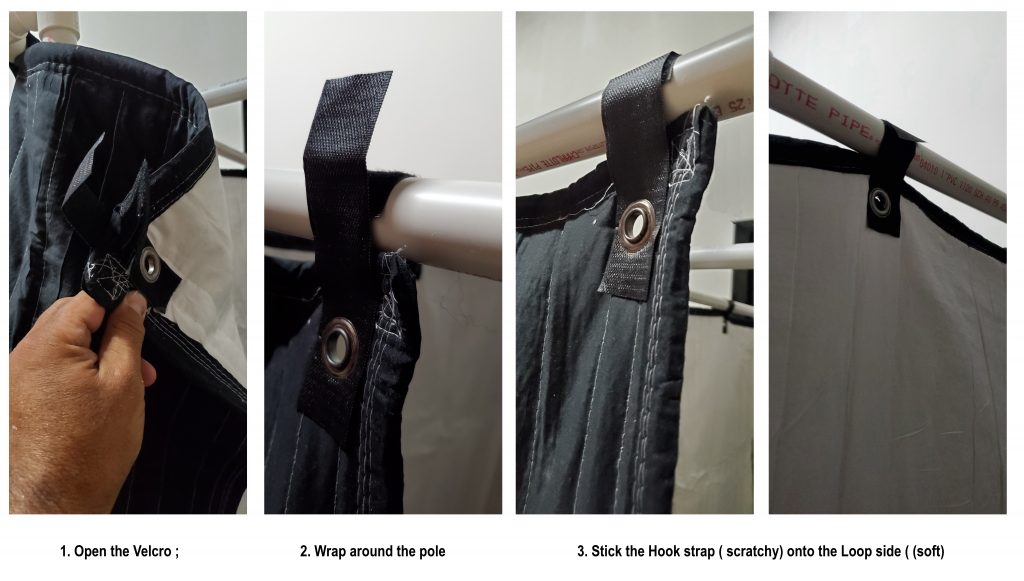 NOTE: In these instructions we show how to hang the SB-VG blankets. (These are acoustic blankets that were specially designed to work with DIY vocal booth frames. They have Velcro tie ups as as well as grommets installed).
If you use a different type of blanket, you can use zip ties or any other attachment method.
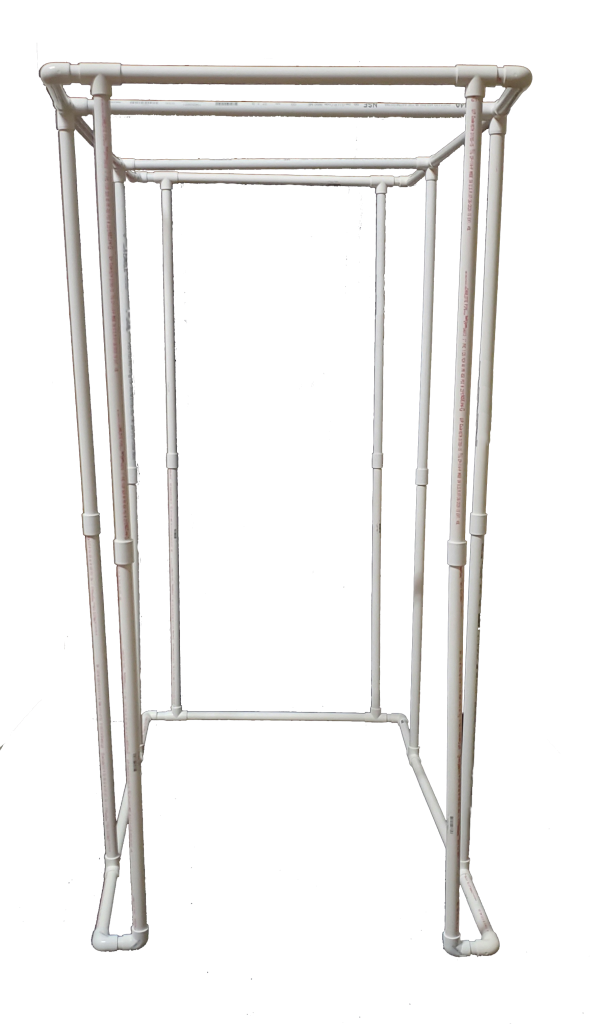
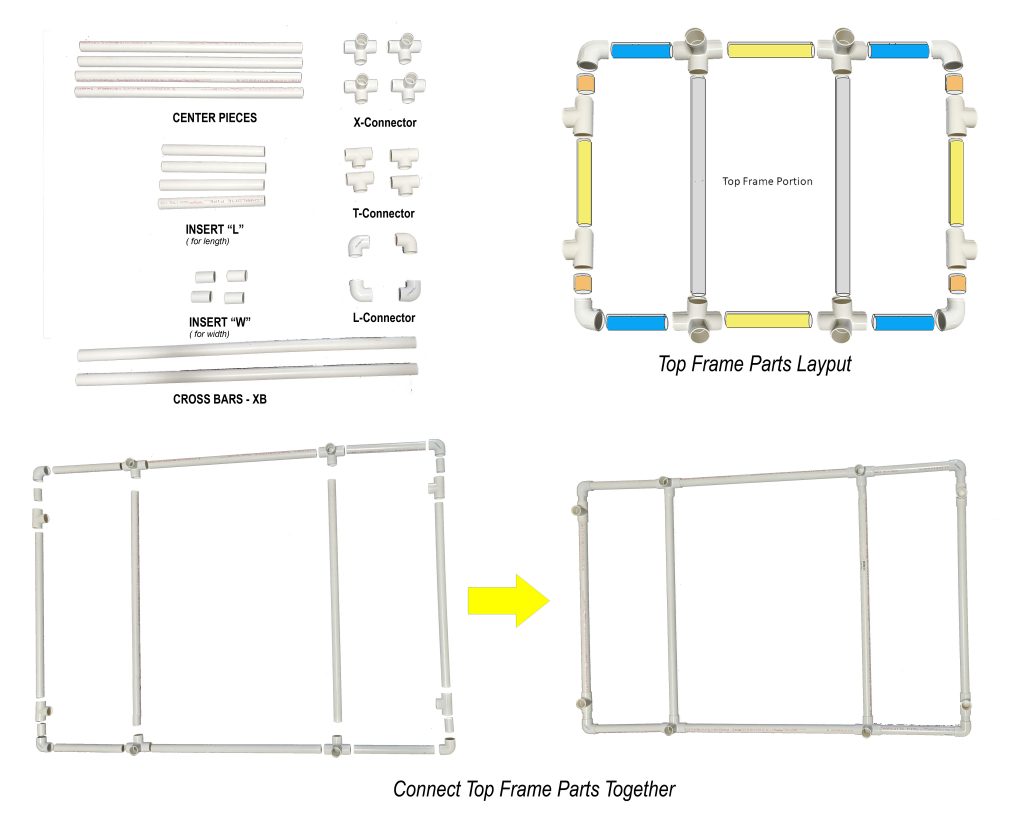
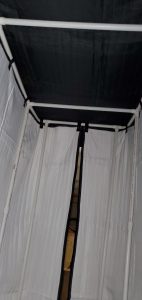
If you added cross bars to your PVC frame, this is what the assembled booth would look like from the inside:
NOTE: In these instructions we show how to hang the SB-VG blankets. (These are acoustic blankets that were specially designed to work with DIY vocal booth frames. They have Velcro tie ups as as well as grommets installed).
If you use a different type of blanket, you can use zip ties or any other attachment method.
If you added cross bars to your PVC frame, this is what the assembled booth would look like from the inside:
What acoustic blanket to choose?
We suggest SB-VG or any other Producer’s choice blanket of your choice. Producer’s choice blankets are the true acoustic product, they have been tested at independent acoustic lab. NRC 0.8. (80% noise reduction). Or if you overlap them or hang them loose the sound absorption efficiency goes up to about 95% sound absorption.
This finishes the Complete Booth assembly.
Now set up your gear and enjoy your new booth!